
Hello! We have seen an increase in the groom techniques from all sides, and some require some modeling knowledge. From Hair Shell sculpts to proxy meshes. On this one, we will see how to bring the groom into a proxy state.
This pretty standard in the VFX area. When you have a groom and want to create a proxy shell of this groom as a geometry, this can work for animators for posing, for riggers to have a proxy and not always happens that you have the proxy before you start to groom, and sometimes the groom changes the way the proxy behaves so you need to generate a proxy from these new curves and these New Groom so here we will see how to create that with an easy workflow from Houdini I will, later on, make an HDA from it and we'll share it for the shell, but for now this is a process that we must follow this comes from a chat that I had with Scott Denton, and this is the final result
This technique can also be use to generate 3D models of fur for printing, which is one of the most advanced applications and one of the things that normally make people concerned the most. This structure will even keep the inner shell for the printer connections.
STEP 1
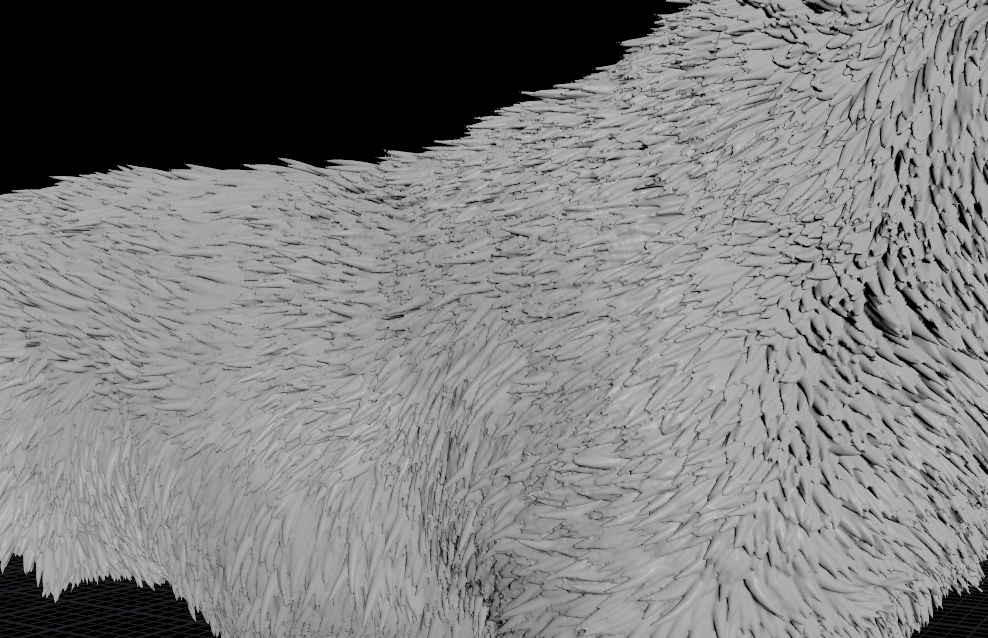
Take your full curve ingest. This curves can come directly from houdini, or more normally as an ALEMBIC from a thirdparty software. Normally at this stage you work with the 100% groom. Its important also for maximun fidelity to export the @width value with the alembic curves, we will use this value later to have a better result on the final look of the groom.
The most important part is to have enough curves to follor the general silouethe and the macro level of detail that forms the primary and some secondary forms. We dont care that much for the terciary forms as they are not inteded to be visible on the proxy.
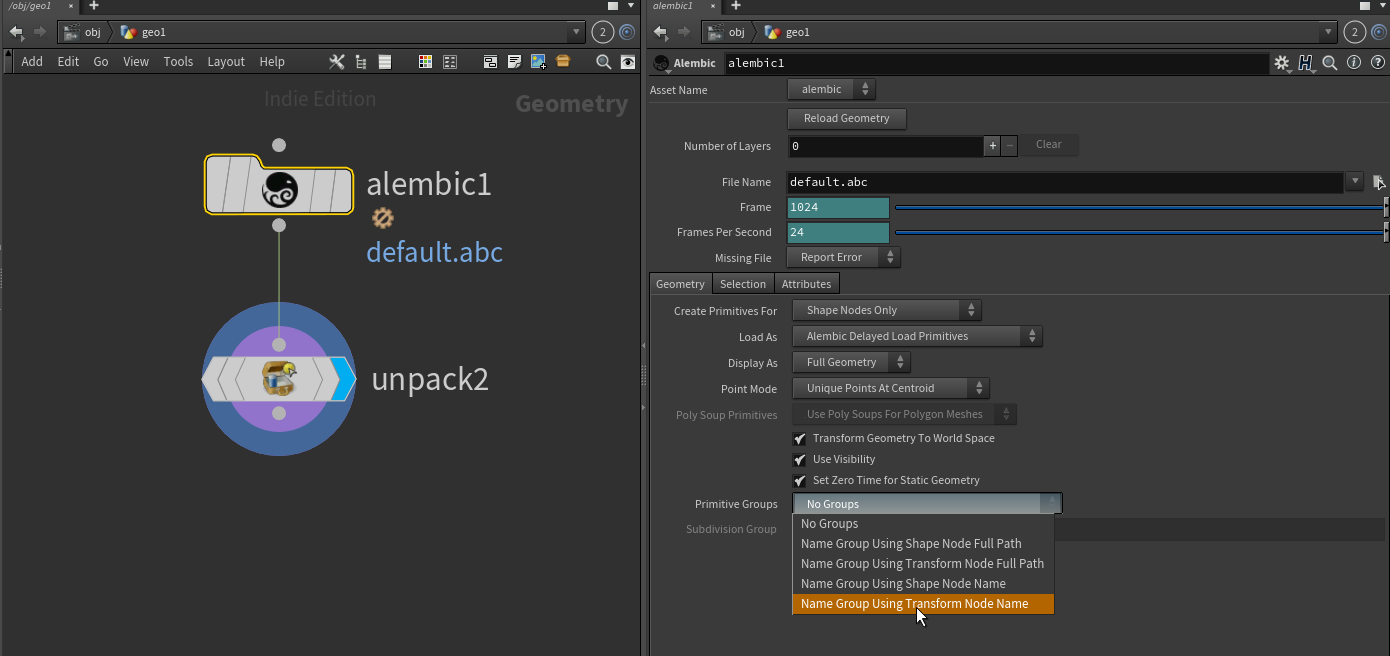
If its an alembic then you need to import the alembic in and unpack it, you can also work with BGEO and FBX. The only thing that you need to have is an unpacked set of primitives, as we will use the individual curves on this process.
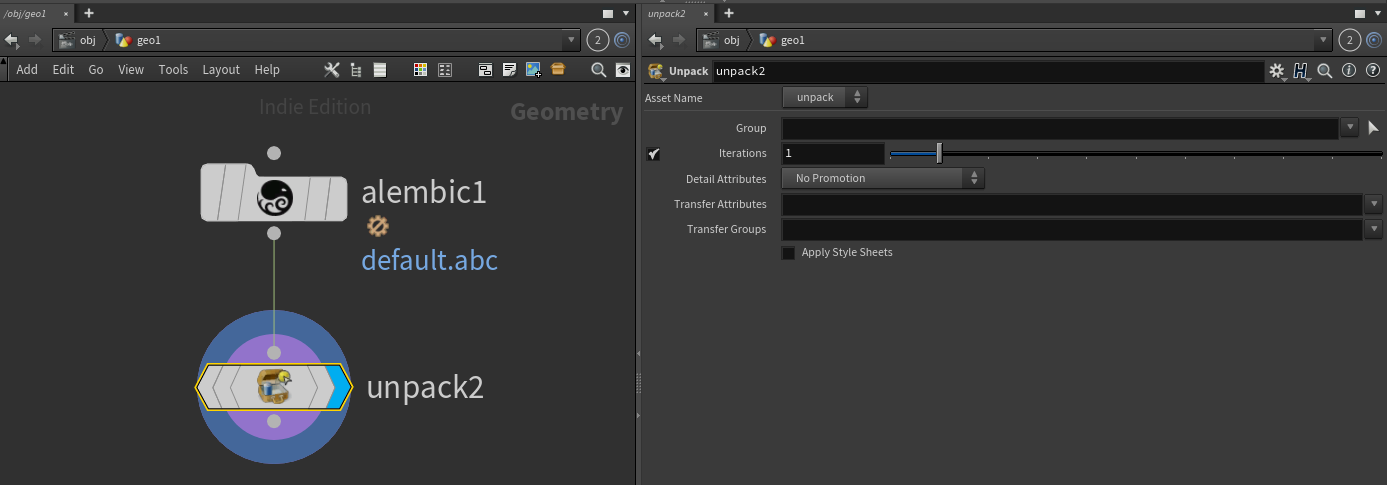
You can also unpack directly in the alembic node by changing the primitive groups, but this may create unnecesary information.
Step 2
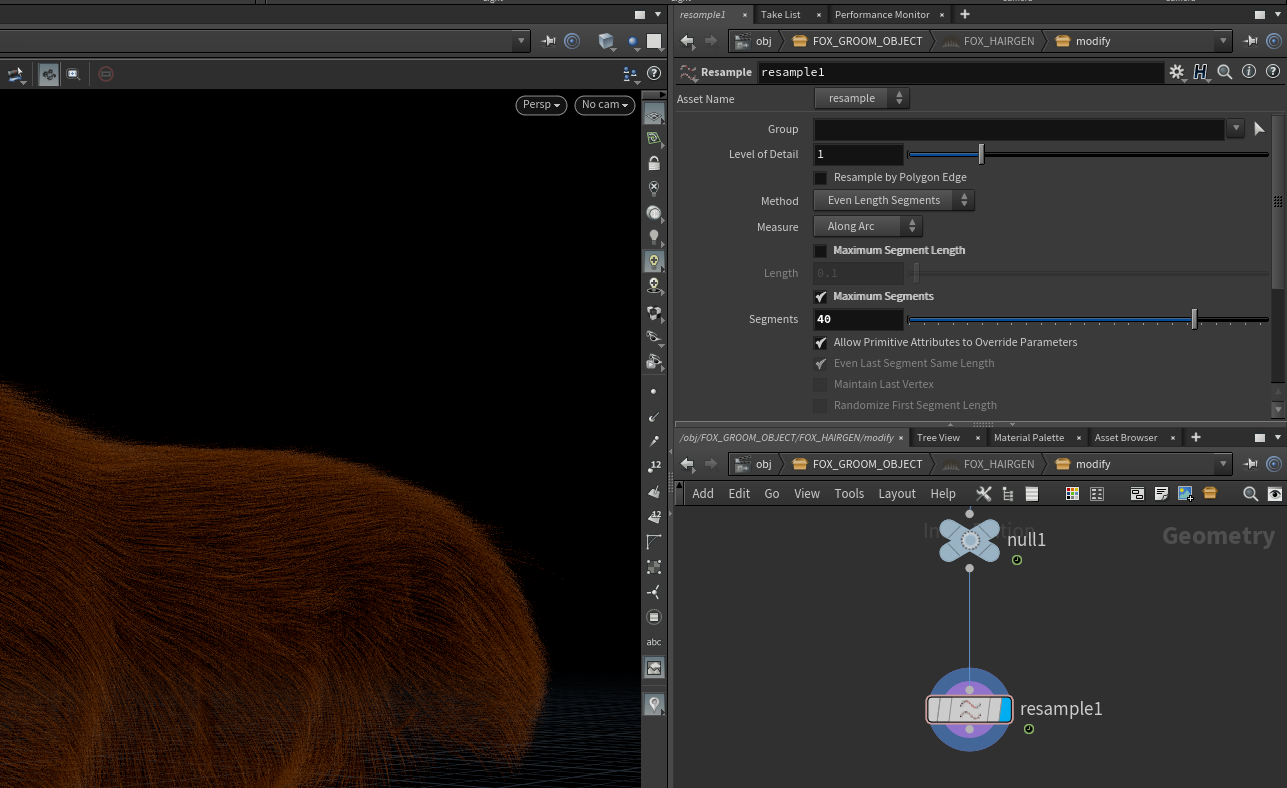
Resolution
Use a resample to add more points to the curve, this will give us more resolution later to have full model coverage. If you see wholes in your mesh later on step 5 you need to increase the resolution here. At this point I have 40 CVs per curve, way more than what we normally use.
STEP 3
Width controls
For the best result we need to play with the width of the curves, as we will not use the 100% unless necesary we can fake a bit of the visual look as width. Try to always export the ALEMBIC with WIDTH information when possible. If not lets create the value and adjust it here.
we will add a bit of code to multiply the existing width of the hair and give it a new profile, this will make it easier for the volume later. At the same time we will assign this width value to the points as PSCALE, which is the universal name for particle size in houdini.
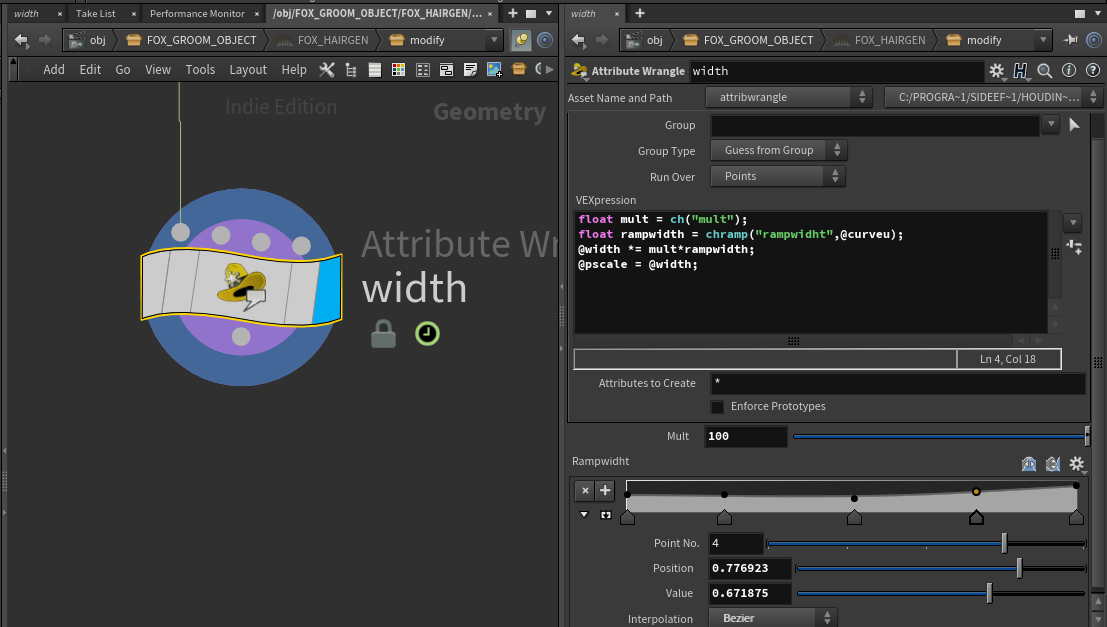
I am using a multiplier of 100 to increase the width to its more visible per hair. And I am adjusting the tip root and tip values with the ramp.
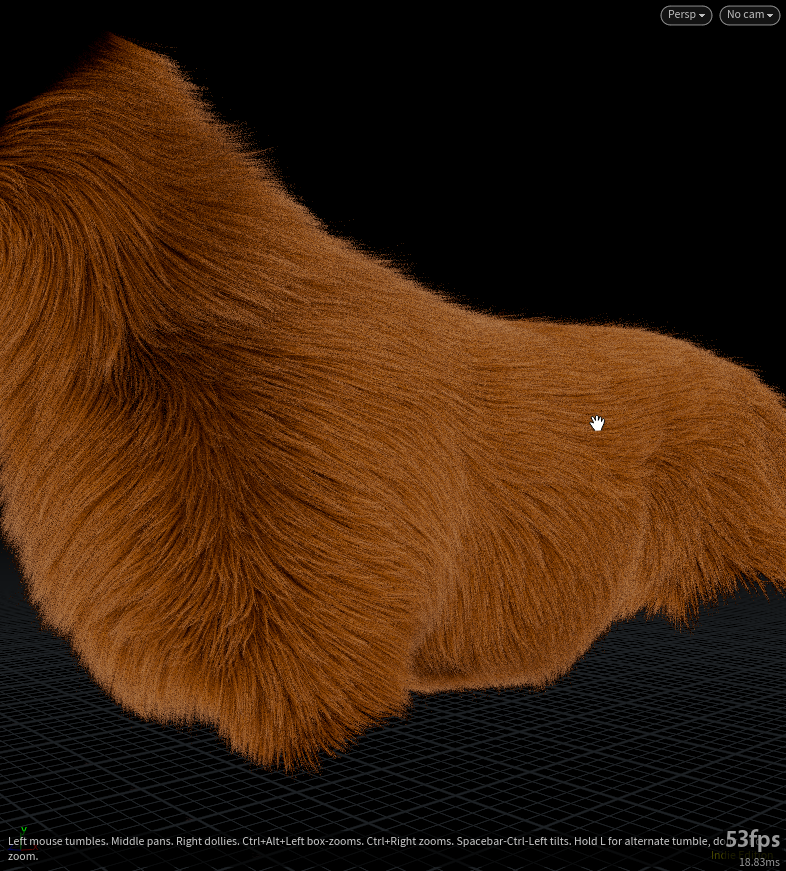
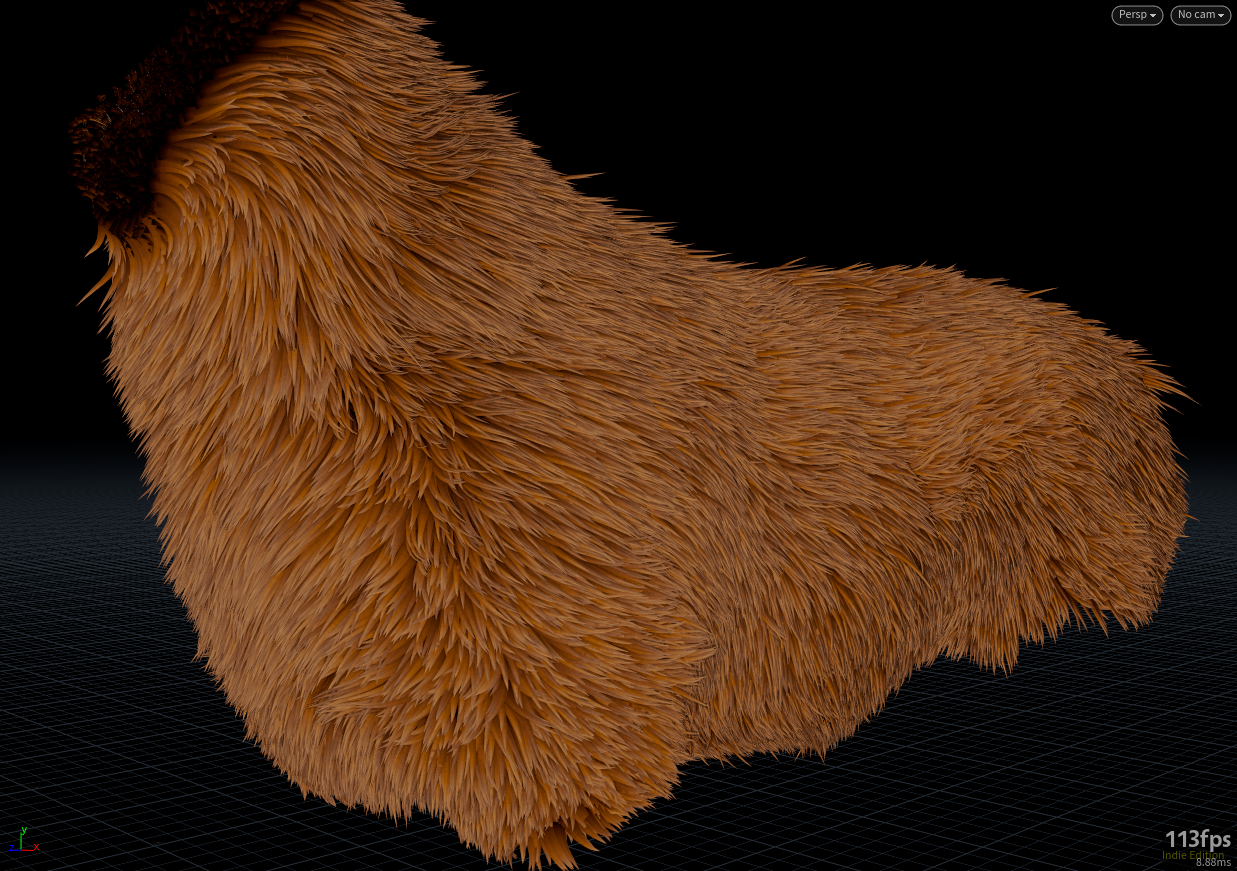
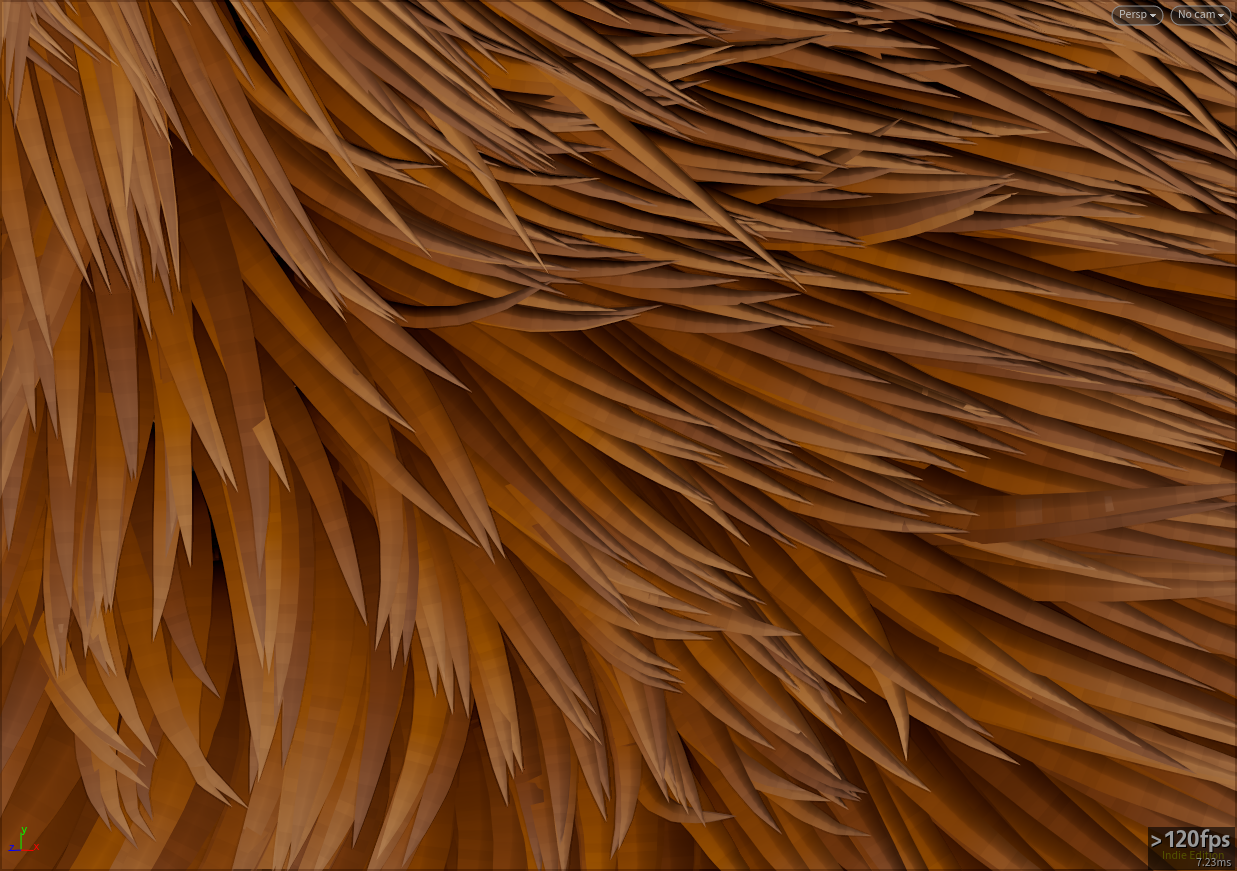
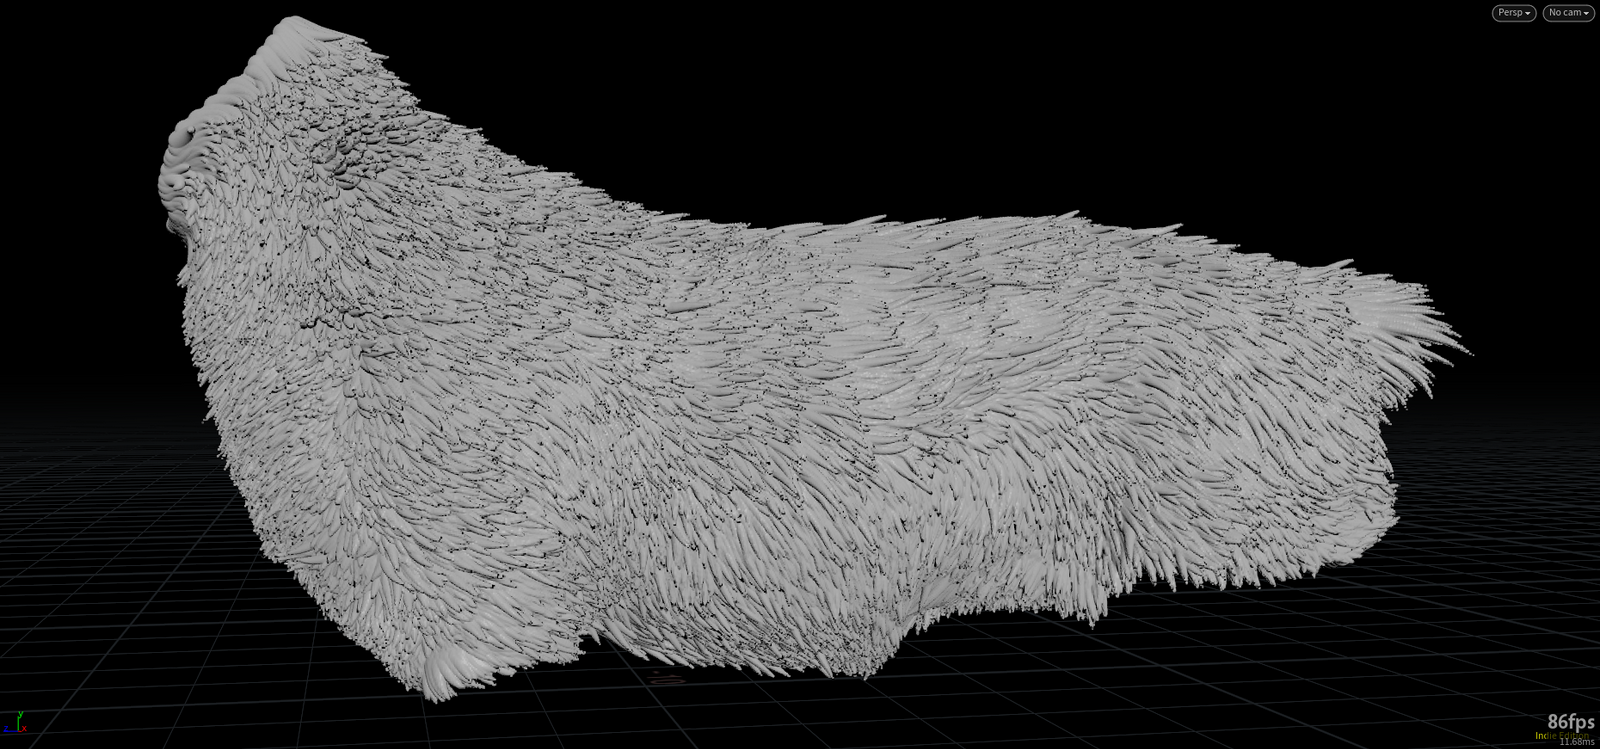
This is how the groom looks now.
STEP 4
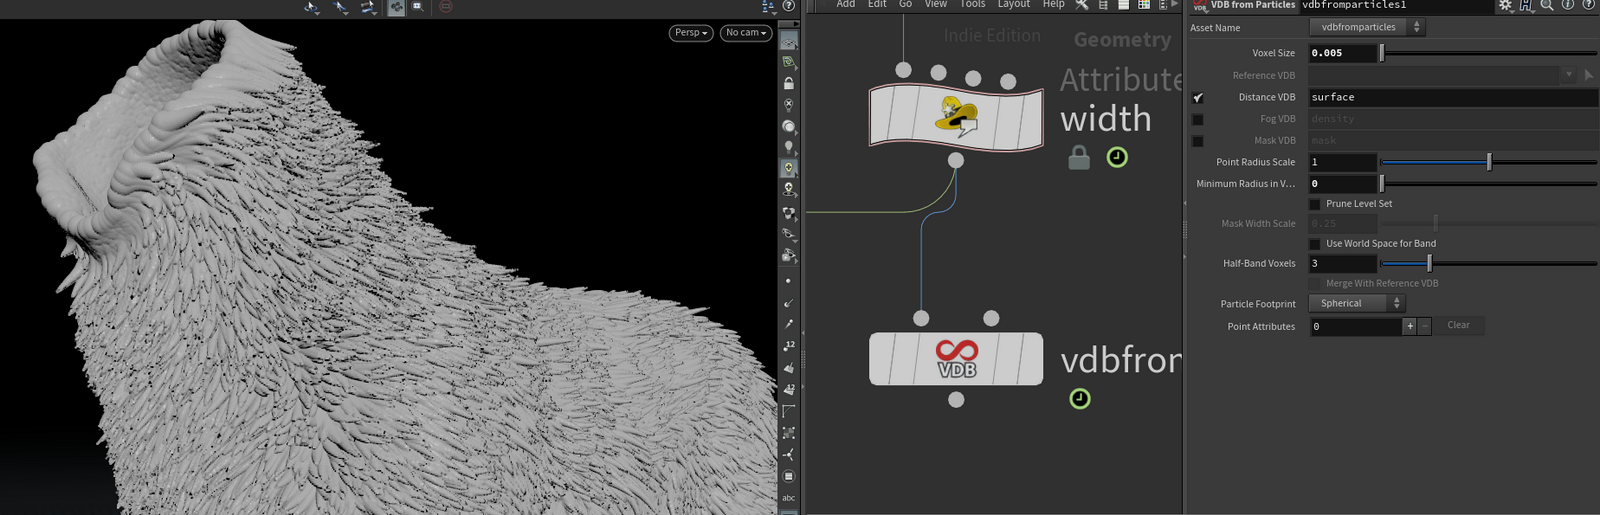
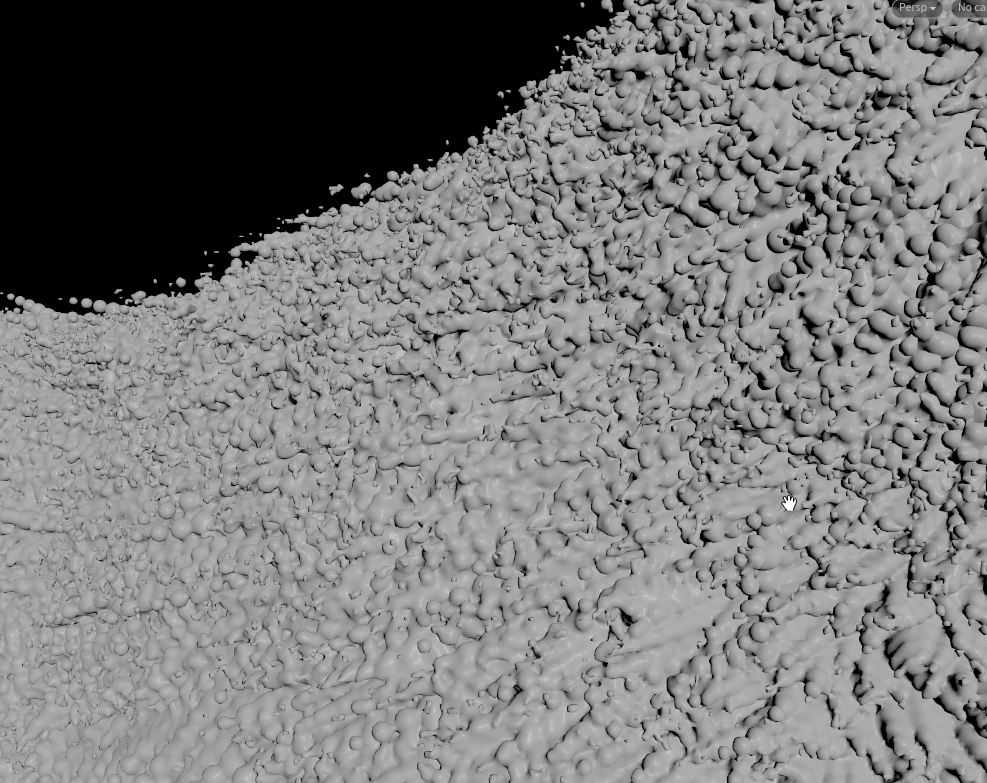
To create the volume we will use** VDB from particles**.
This process requires a scale input, so everything that you do will be based on the scale of your model, so be aware of the values as they may not give you the same results.
Then I create a vdb from particles node, the basic result will look like this , I had to reduce the minimum radius value to be able to display the basic attributes.
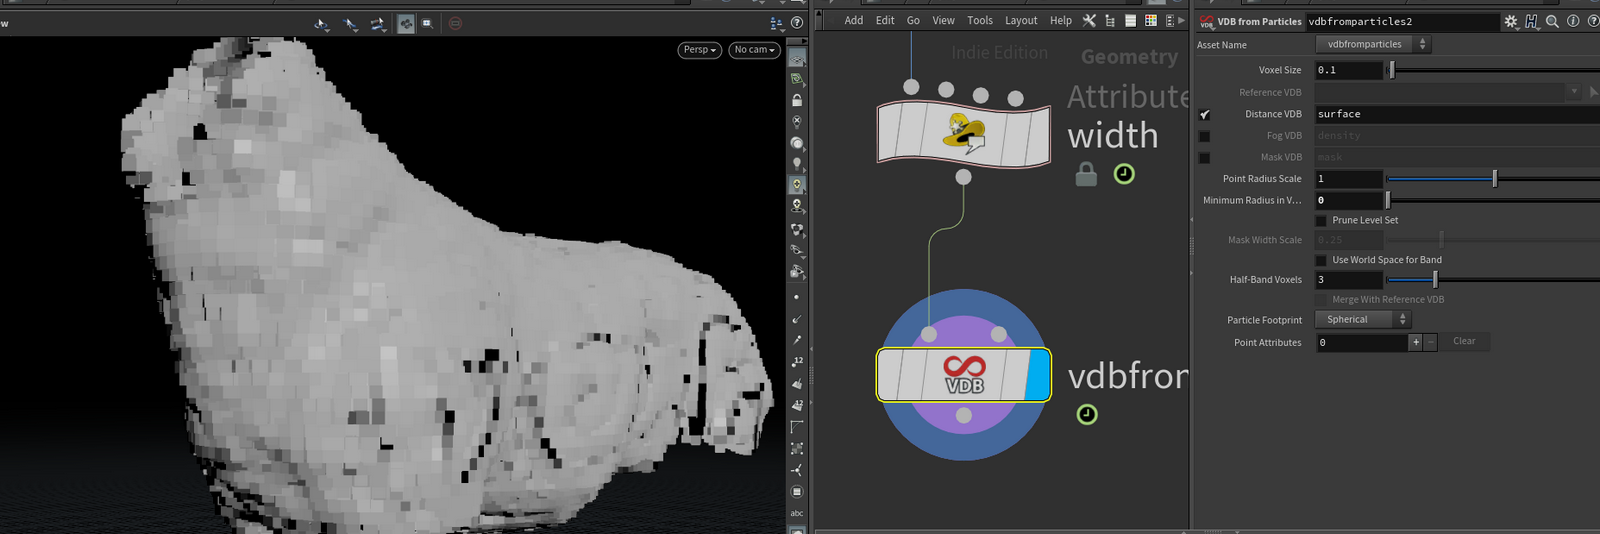
From here onwards we need to adjust the values, the only information that you need to tweak is the voxel size, because the radius scale is coming from the PSCALE in point 3.
Another point is that the smaller the voxel size, the more resolution you are adding to your vdb which means it will take longer to compute.
On this case I am using the FULL CURVE, 100 k of them to generate this volume, as you can see in the preview before the voxel size is too big, so I reduce it from .1 to 0.005. and it looks like this now.
STEP 5
Convert to geometry.
This is the easiest step, you just need to add a convert node and boom.
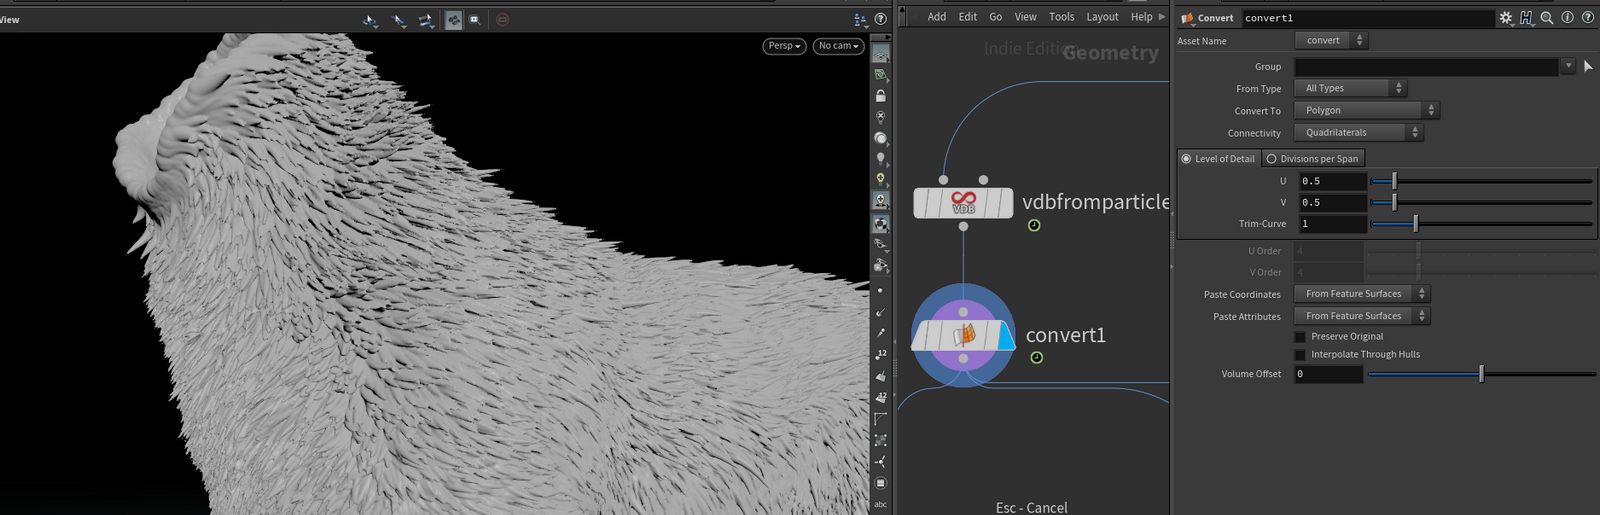
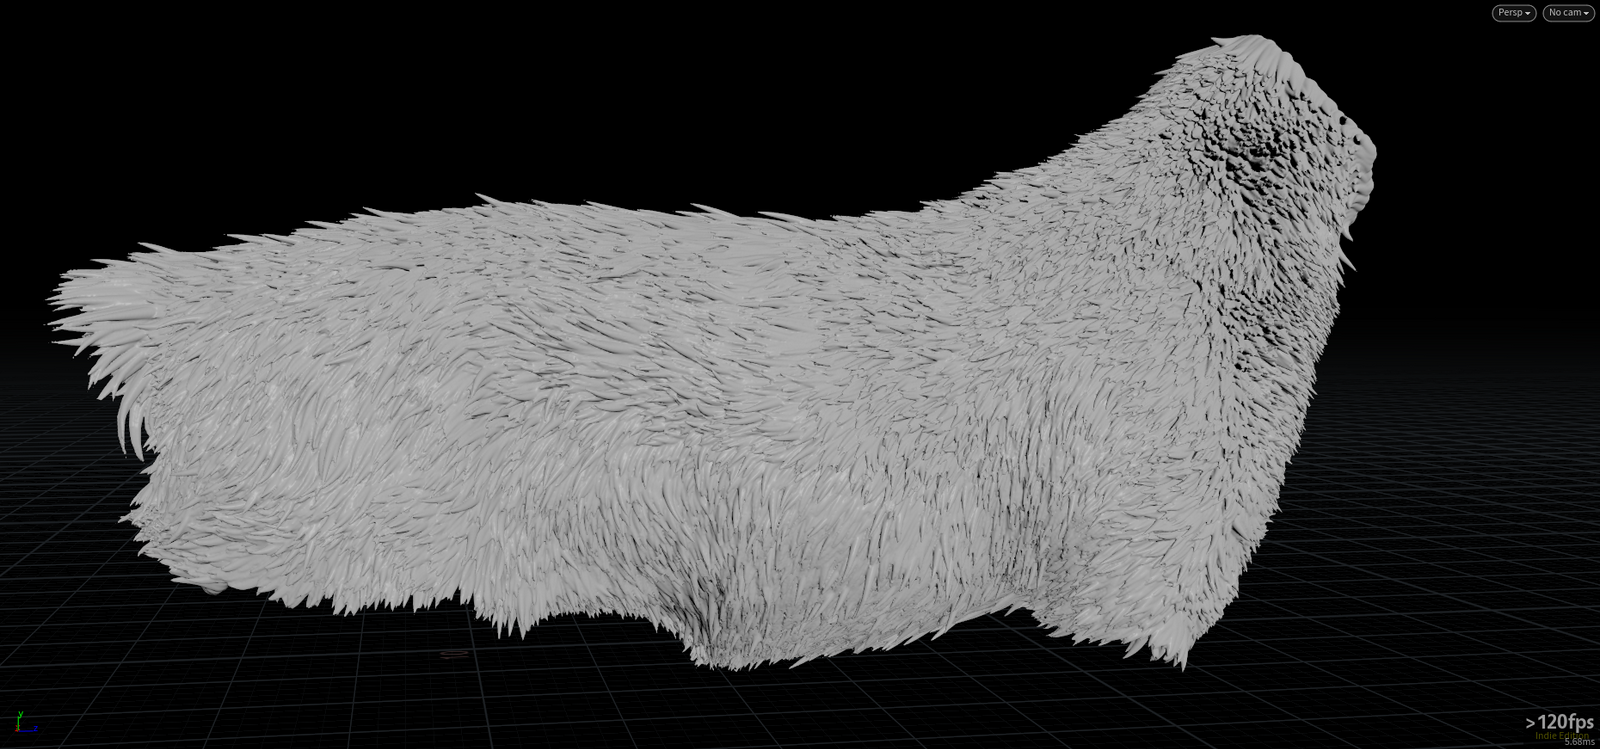
Now its just time to tweak the network. if you want more or less resolution, if you want to fill the curves. With a lower curve point will look like this. To fix it just increase to a higher Value
FINAL STEP
Export, this is the simplest part as we just need to decide how we want to export it as alembic or as fbx.
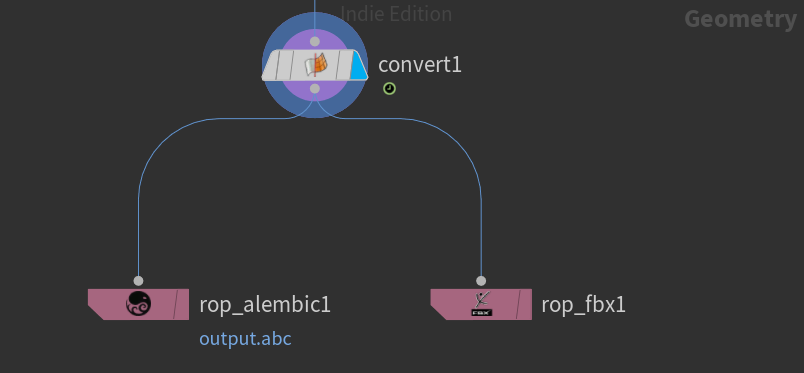
And save.


.png)

